Painting kitchen cabinets is a big job, but it can transform the look of your kitchen at a fraction of the cost of new cabinets. It may sound daunting, but breaking it down into bite-size steps can take away the fear factor.
Here is the basic order of operation: clean, sand, prime (optional), paint and seal. Now, that’s not so bad, is it?
When planning to paint your kitchen cabinets, there are a few considerations. Are your cabinets in sturdy shape (or should they be replaced)? If salvageable, what color/look are you going for? Do you need to prime first? Will you change the hardware (and if so, will you need new holes)? Are any repairs necessary? What products do you need to achieve best results?
The oak cabinets in my kitchen had seen better days but they were solidly constructed, so I recently freshened them up with some paint and glaze. Here is how I achieved my “ugly oak to graceful gray” upgrade for under $200.
INSPIRATION
As you can see in these “before” pics, we have oak … so much oak. Oak cabinets, oak trim, oak banisters, you name it, we have oak. Now, my husband likes the oak … me, not so much. So we compromised on leaving the trim but painting the cabinets.


EDIT: We decided afterwards that we didn’t like the trim that way, so I will be painting that to match the cabinets later.
I found inspiration in this beautiful piece on the General Finishes Design Center by The Painted Tulip. I love the gray with the detailing highlighted with the black glaze.
I also really like the look of my cousin’s new rustic gray cabinets, pictured below.


Important Tip
Before we get down to the nitty-gritty of the how-to, let me make one suggestion. If you are planning this type of project, divide it up into manageable chunks and work on one section at a time. Painting kitchen cabinets is a big time commitment, so don’t jump in thinking you can get it done in a weekend. Not gonna happen. I did mine over the course of four weekends. Yep, for real. Plus working some in the evenings after being at work all day. The good news is we were still able to function in our kitchen, and it was a lot less physically demanding by breaking it into three chunks. Plus there was only so much room to work around the doors I had taken down.
Here we go…
REMOVE DOORS & HARDWARE
Remove cabinet doors and all hardware, numbering them as you go so they can go back in the same spots. It may seem like more work taking the doors down, but your results will be worth it. It is much easier to lay down paint on a horizontal surface, the paint won’t “sag” and you won’t have to climb up and down to get the job done. But it is possible to tape over the hinges and knobs, and leave the doors up.
Using the same hardware? Mark which set goes with which door, and put them in a baggy. Time and use have a way of slightly warping things, so make it easy on yourself and put them on the same doors they came off. If you choose to update your hardware, make sure the new will work with the existing holes, or else plan on plugging and redrilling to accommodate the new dimensions. I was switching mine out for the same size, so all the old hardware went into a tub.
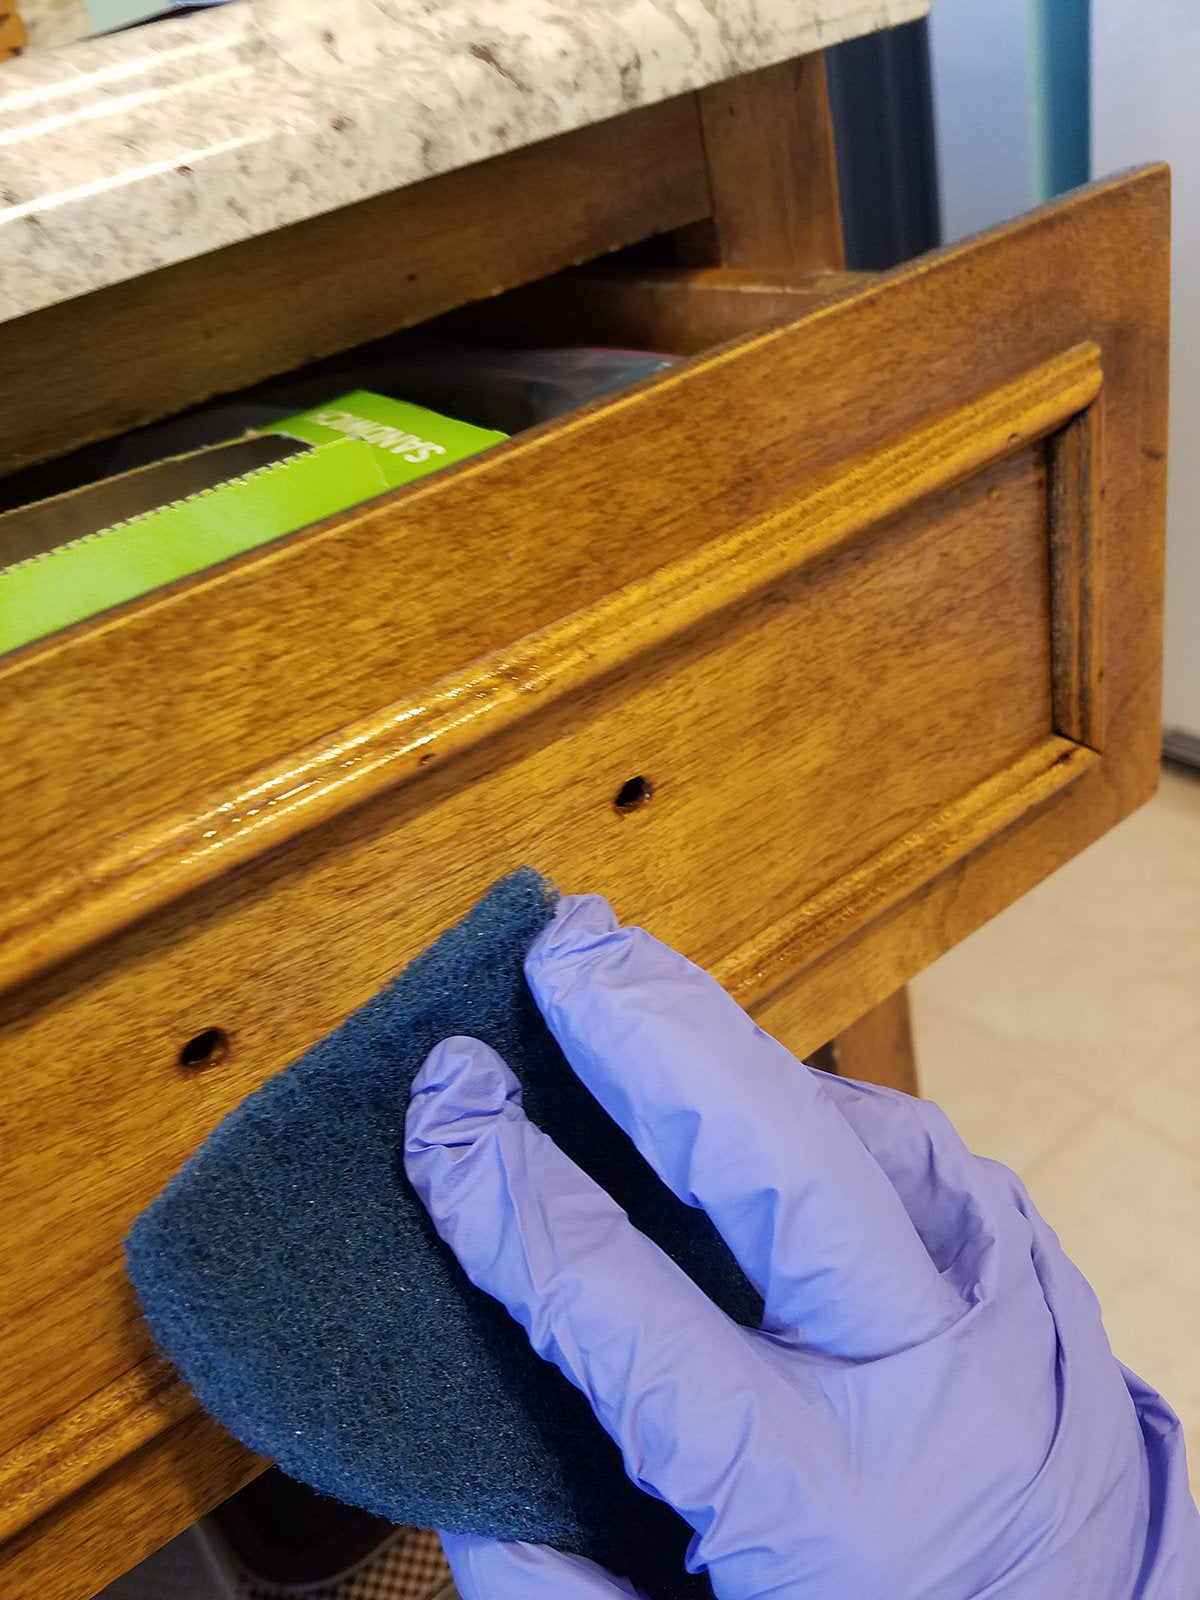
CLEAN
The kitchen is usually the hub of the home, getting loads of daily abuse in the form of cooking greases, smoke and smudgy fingerprints. Naturally, your cabinets can become pretty grimy over time, so a good cleaning is a must to ensure proper paint adhesion.
To cut the grease and buildup on my cabinets and cupboard framing, I scuff cleaned with a Scotch Brite pad and a 50/50 mix of denatured alcohol and water, and then wiped the surfaces with a soft, clean cloth. You could also use Krud Kutter or TSP, but be sure to wipe down your cabinets after cleaning and allow for dry time. Do not use dusting sprays or oil soaps as they will compromise the appearance and adhesion of your new finish.
Also, remove felt pads and any sticky residue that may be left behind.

What is denatured alcohol?
Rubbing alcohol is a generic term and is usually manufactured with isopropyl alcohol. Denatured alcohol contains ethanol and is engineered to discourage recreational human consumption by including additives that are poisonous, bad tasting, bad smelling or nauseating. A 50|50 mix of either rubbing alcohol and denatured alcohol will work for prep cleaning. Both have good solvents that will remove dirt and grime. And both are readily available at either a hardware store or pharmacy. We opt for the denatured version.
At this point, if you have any holes that need filling, now’s the time. I used Timber Mate water-based wood filler to patch up a couple of spots. It comes premixed in several wood colors for repairing furniture but if you are painting over it, any color will do. I used Natural, pushing it down into the cracks and holes with a mixing stick. It dries quickly and was ready to sand in about 30 minutes.

SAND
My cabinets had layers and layers of shellac on them, so it was important to sand them down to give the paint something to grab onto. I sanded the bigger sections with a Festool palm sander, and then used some 220-grit sandpaper in the corners where the sander couldn’t reach. Next, I wiped all the dust off with a damp cloth. This is also a secondary cleaning step that further removes more gunk. Plus it evens out any imperfections in the wood, which will give a smoother finish.

After cleaning and sanding, you should be left with a dull surface ready for paint. It’s not necessary to sand down to bare wood – just remove the shine and level out the bumps. Following the prep, I taped off any areas above and around my cabinets where I did not want to get paint, and put down a drop cloth to protect the kitchen floors.
PRIME
As I said above, priming is optional. Yes, it’s an extra step, but in my case, I wanted to ensure that the wood tannins or the old finish didn’t cause any bleed-through. Sometimes it’s a gamble whether you should prime or not, but I didn’t want to chance it coming back to haunt me after all my hard work. I used General Finishes Stain Blocker, which is a white, water-based primer that also acts as a base coat for lighter colored paints. It’s not cheap (about $110/gallon) but as General Finishes says, it’s designed for effectiveness, not price point. And it’s a tad stinky.

A less expensive primer/stain blocker that I also like to use is Zinsser Bulls Eye SealCoat, a clear shellac that sticks to anything and dries super fast, for less than half the cost. P.S. It’s a little stinky too.
General Finishes recommends two coats of Stain Blocker: the first to absorb bleed-through and the second to seal the bleed-through. After stirring the contents, I applied two coats with a #14 Black Dog Salvage Furniture Brush, the largest of the three brushes in this line. The round brush has a blend of natural and synthetic bristles trimmed into a dome shape that makes for a smooth finish with minimal brush strokes.
A roller works nicely on larger flat surfaces and doors as well, or the finish can be sprayed on. A tapered brush can be handy for working paint if your cabinets have a lot of detail. Because of how I chose to break my project up and the amount of cleanup between steps, I opted for brushing it on and it still looks nice. General Finishes paints level out really nicely.
PAINT & GLAZE
My inspiration look was created using General Finishes Seagull Gray Milk Paint and Pitch Black Glaze Effects. So after completing my cleaning and priming, I gave all surfaces two coats of Seagull Gray, drying between coats. One coat may have been enough since I was glazing afterwards and it would cover any imperfections in the gray, but I went with two just for a nice even base. You can also do a light sand between coats for an even smoother finish.

For the removed doors, I did the backs first then flipped them to do the fronts, keeping them up off the drop cloth with Painter’s Pyramids (and soup cans when I didn’t have enough!). Having the doors lifted up also makes it easier to brush off any drips around the edges.
In order to have more control of the glaze, I next brushed on a coat of General Finishes High Performance Topcoat Flat (satin works great too) over the gray. This allows the glaze to “glide” a little better by creating a barrier between the paint and the glaze.
Once the topcoat was dry, I used a foam brush to liberally apply the glaze in manageable sections. You don’t want to work too far ahead with glaze because once it dries it is way harder to manipulate. I did about a third of a door at a time. After applying the glaze, I took a cloth and wiped back any excess, keeping my strokes going the same direction until I achieved the look I wanted.


I kept a spray bottle of water handy (or a damp cloth works) in case I needed to get a lot of glaze off quickly. If I wanted a darker look, I just added more glaze and repeated the process. Glaze was also applied in all crevices and corners, as well as the tops and sides of all doors and drawers and cupboard framing.
The black glaze gave some depth to the gray and settled into the trim areas to create the beautiful soft washed look of my inspiration project.
A word of caution: Don’t rush the drying process! You will end up creating more work for yourself in the long run. Ask me how I know. Ugh. I had to repaint a few doors when I attempted to glaze them with only about 4 hours drying time, and the glaze did not come off uniformly. I let the next round dry overnight to avoid a repeat.


SEAL
Once all the surfaces had been glazed, the next step was to seal with topcoat to protect the finish from abuse in your kitchen. I brushed on three coats of General Finishes High Performance Topcoat in Flat finish, drying at least 2 hours between coats, per instructions on the can.

REATTACH
Finally, all the doors were hung back up with new hinges, knobs and drawer pulls. I chose Cosmas weathered nickel replacement hardware from Amazon to coordinate with the new gray cabinets.
TIP: We found that a few of the screw holes had been stripped when we went to put the new hardware on. There are some products out there that you can use to fill the hole and redrill it, but a quick and easy tip is to just use a match stick. Stick it in the hole, break it off flush and redrill! Easy peasy. (Thanks for the trick, hubs!)


Weathered nickel knob by Cosmas
BUT WAIT, THERE’S MORE!
Houses from a certain era, including mine, typically have a scalloped wooden “valance” over the sink area between the cabinets. I felt like it really dated the kitchen, so I had been debating on removing that piece. But then I wasn’t sure if it would affect the stability of the upper cabinets or what I was getting into with taking it down. So when I happened upon this neat farmhouse sign at a local shop, Mulberry Lane, I knew I had found my solution! It fit perfectly and you’d never know there was an outdated scalloped edge there.

WHAT A DIFFERENCE!
Here is our before and after! We still have some updates to do, like replacing the rest of countertops and upgrading the backsplash, but we’re really happy with how it turned out. It has made a huge improvement in the way the room looks. And I’m super glad to have the kitchen back in proper working order.


Cabinets are Lenny approved!


What’s your next big project? Do your research, make a manageable plan and get to work! The associates at your local Woodcraft store are there to help you select products, answer your finishing questions and point you in the right direction for whatever you have next on your to-do list.
We hope you'll be inspired!


